
By special reader request, this media console is so very handsome and wants to live in your home… So go forth and build this beautiful baby and make your home that much more stylish!


- 1 – 2×4 at 8’
- 7 – 1×2 at 8’
- 3 – 3/4” plywood at – 4’x8’
- 1-1/4″ Pocket Hole Screws
- 1 3/4″ Wood Screws
- Pocket Hole Plugs – Paint Grade, Pine, Oak – optional
- Clamps
- Safety Gear
- 3/4″ Edge Banding – optional
- Wood Filler
- Wood Glue
- Sanding Supplies
- Paste Wax
- Finishing Supplies
- Anti-Tip Kit
- 2 – 3/4” plywood at 18”x19-1/4” – Cabinet Sides
- 2 – 3/4” plywood at 19-1/4”x56” – Cabinet Top and Bottom
- 4 – 2×4 at 6” – Legs
- 1 – 3/4” plywood at 16-1/2”x56” – Cabinet Back
- 1 – 3/4” plywood at 16-1/2”x18” – Center Divider
- 1 – 3/4” plywood at 18”x37-1/4” – Left Shelf
- 1 – 3/4” plywood at 18”x18” – Right Shelf
- 6 – 1×2 at 16” – Door Tops and Bottoms
- 6 – 1×2 at 18” – Door Sides
- 27 – 1×2 at 15” – Door Slats
Before beginning to build, always check in on my site to make sure you have the most up to date set of plans, I occasionally update and change the plans to make the building process easier or to allow for less expensive purchasing of materials! Read through the entire set of instructions and all comments before beginning this project. If you print out or save plans, be sure to check in on my site to be sure you have the most up to date set of plans, as I occasionally update things for ease of building or buying. If you are new to building, read through the GETTING STARTED section and other articles found under the BUILD tab in the menu on my site, it has valuable information about how to get started, tools and techniques. If you are unfamiliar with the finishing process, visit my Finishing school for some tips and tricks for painting like a pro and for special finishing practices. Use glue to secure your joints and Consider Painting or Staining individual sections prior to assembling. This makes the paint application virtually flawless. Coat with a spray on Poly or Wipe on Poly to protect your finish and your piece and it will last for ages. Adhere to all safety standards and guidelines, and be sure you follow safety protocol throughout your build. If you are unsure about whether you are building safely, run a quick online search for the tool or technique you are using, or contact me via email or post to the forum before you move ahead. My contact info can be found in the menu of my site.
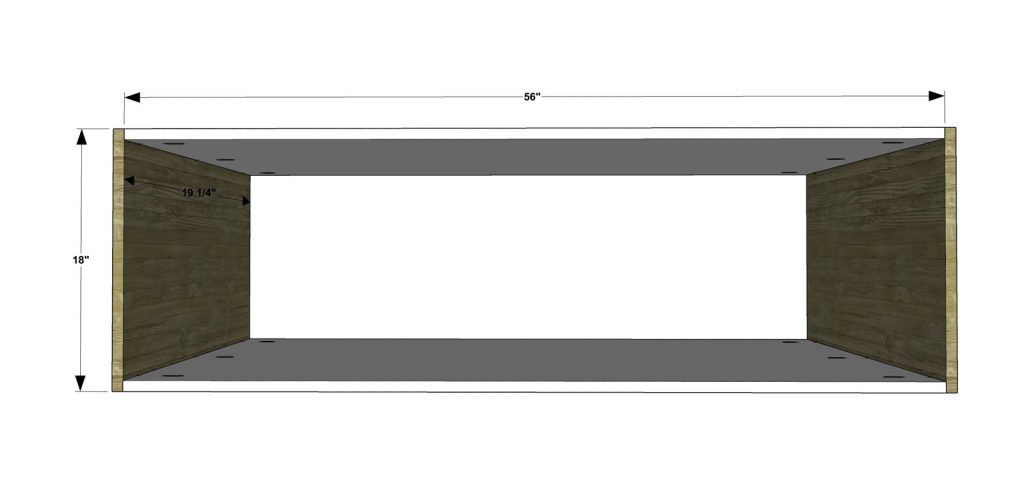
Cut the pieces for the Sides, Top, and Bottom. Apply edge banding to front edges of all pieces, if desired. Set the Kreg Jig for 3/4” material and drill pocket holes in the ends of the Top and Bottom pieces. Make sure the pocket holes will face the inside of the Console. Assemble pieces as shown with glue and 1-1/4” pocket screws.
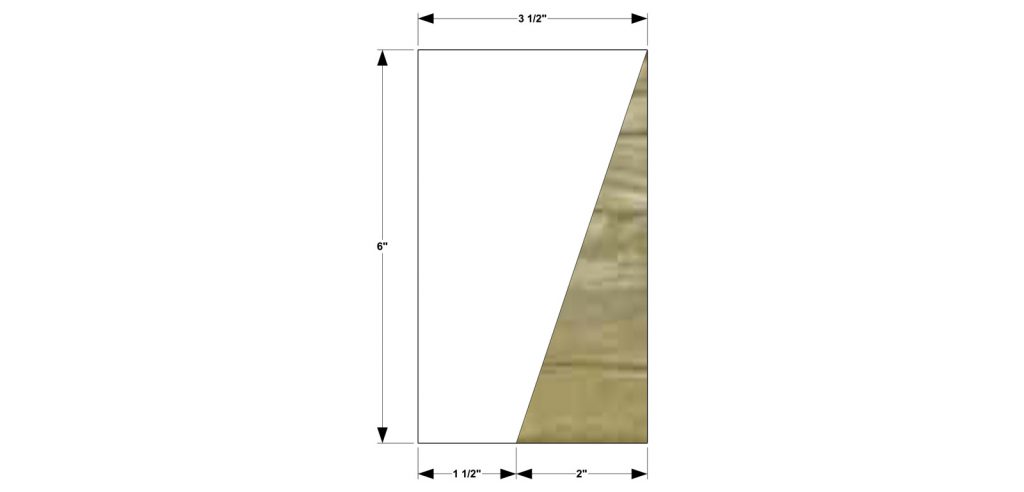
Cut the pieces for the Legs. You will need 4 of these exactly the same. This diagram shows you how to mark out the shape you need for the Console Legs. Use your circular saw to cut this out. If you simply connect the dots between the dimensions outlined below and use a circular saw to make these cuts, you won’t have to worry about the actual angle for each corner.
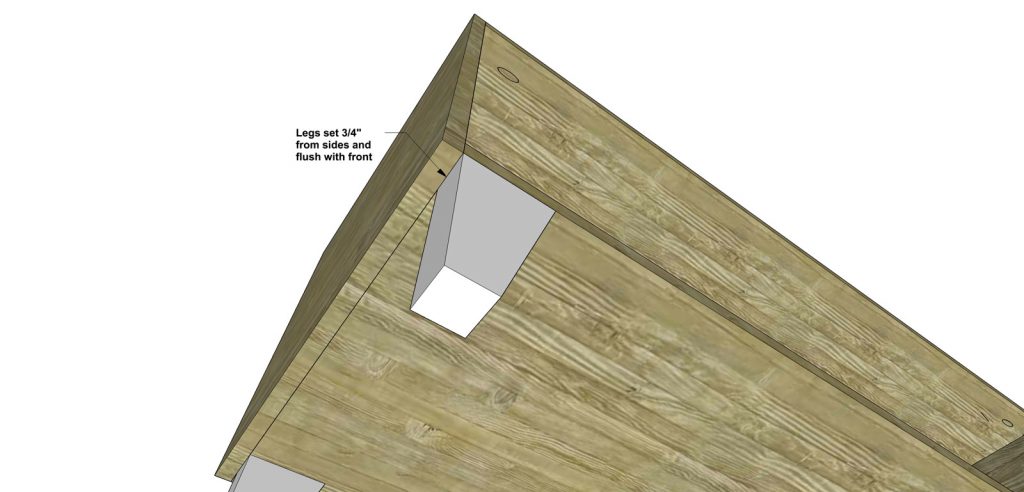
Attach Legs to the bottom of the Console as shown with glue and 1-3/4” wood screws. The Legs should be placed 3/4” from the Sides of the Console and flush with the front edge of the Console. Insert the wood screws down through the Console Bottom into the Legs so that the screws are hidden. Also, make sure that the screws are countersunk so that they do not interfere with items placed inside the Console.
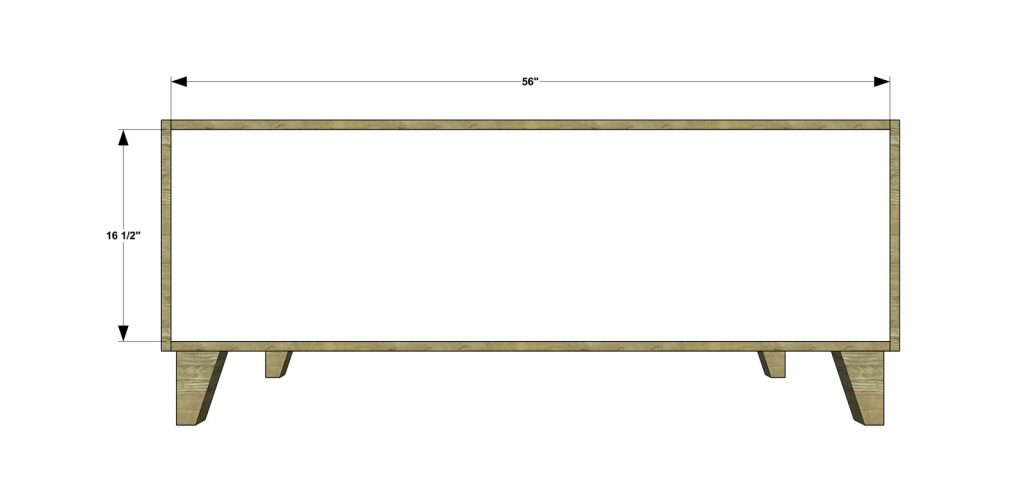
Cut the piece for the Back. Drill pocket holes in each edge of the Back. Attach the Back as shown with glue and 1-1/4” pocket screws. Make sure that the pocket holes face the inside of the Console.
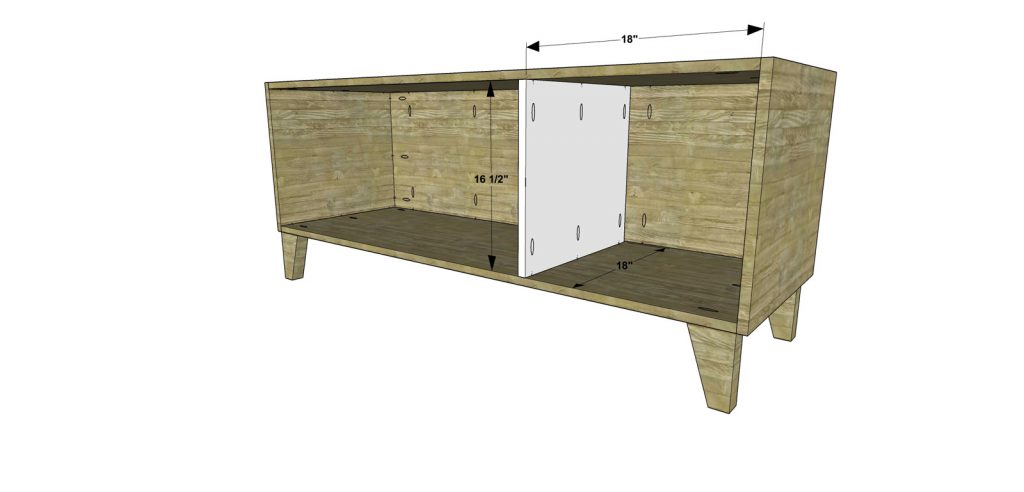
Cut the piece for the Center Divider. Drill pocket holes in the top andbottom of the Divider. Assemble as shown with glue and 1-1/4” pocketscrews.
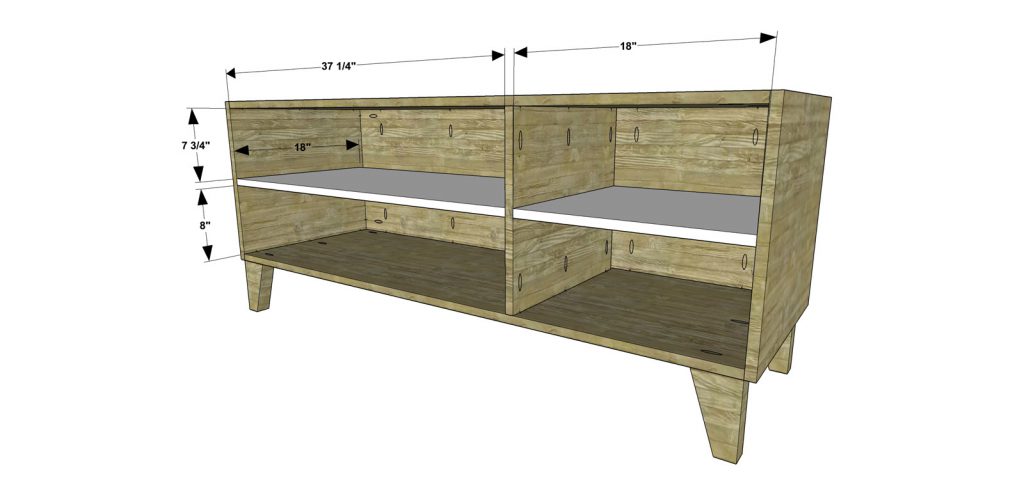
Cut the pieces for the Shelves. Drill pocket holes in the ends of theshelves and assemble as shown with glue and 1-1/4” pocket screws.There will be an approximate 1/2” space in the back between the shelvesand the Console Back.
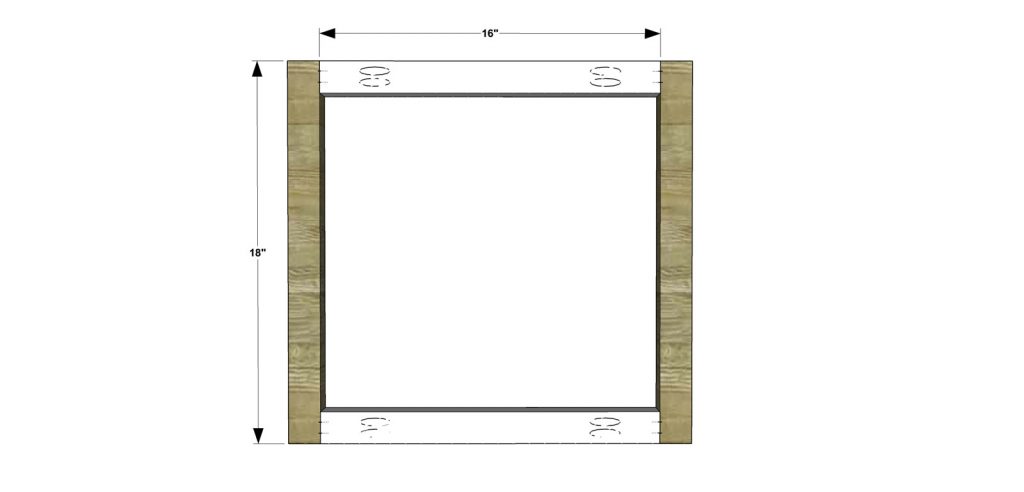
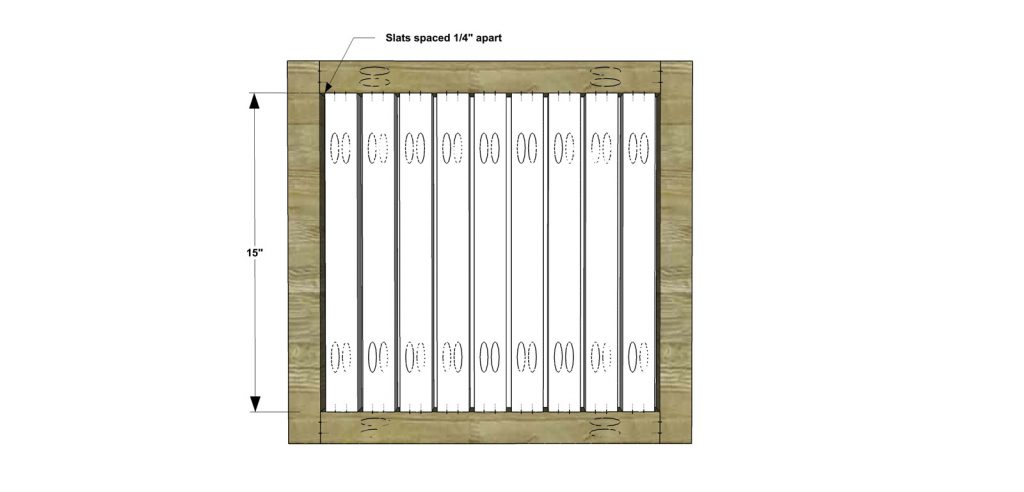
Cut the pieces for the Door Tops, Bottoms, and Slats. Drill pocket holesin the ends of the Tops, Bottoms, and Slats. Attach as shown with glueand 1-1/4” pocket screws. There will be a 1/4” gap between each Slat.Repeat this for all three Doors. Remember to keep checking for “square”on each door – each door should measure the same diagonally in bothdirections.
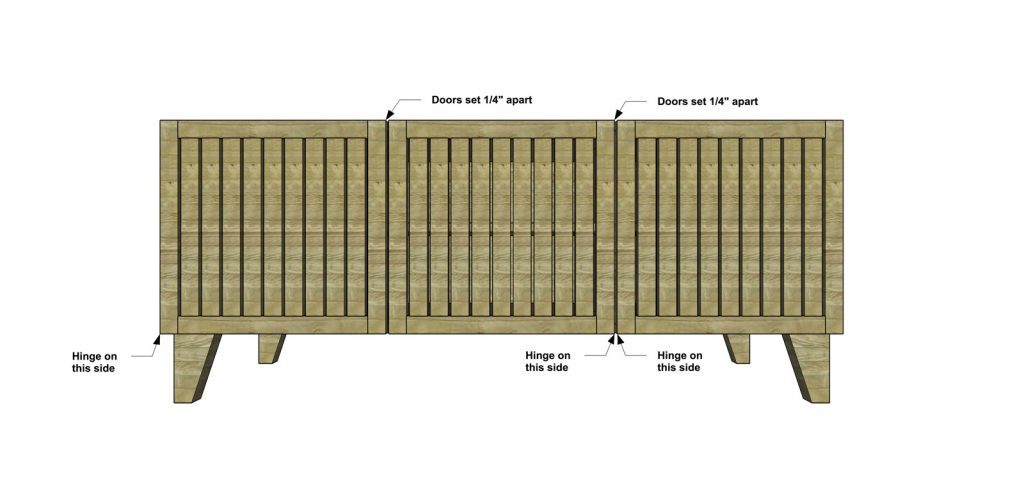
Attach hinges as shown at the top and bottom of the Doors and attach tothe Console. There will be a 1/4” space between each installed Door.Add Door hardware such as a pull or knob if desired.
Fill any Screw, Nail or Pocket Holes, Sand and Finish as Desired. For Finishing Tips and Tricks visit my Finishing School
// Disclaimer: Some rights reserved. Private use only. Feel Free to link to any of my plans so long as you ONLY use 1 image and provide an ADEQUATE link back to the original source and appropriate plan! Plans from this page are not to be used for commercial purposes or republished without the express written consent of Rayan Turner, The Design Confidential I hope to provide accurate plans, however, I cannot guarantee each plan for accuracy. Not every plan that I post has been built and tested, so you are building at your own risk. It is recommended that you have a clear understanding of how the project works before beginning any project. Please contact me if you find an error or inaccuracy so that I might fix it. // Post May Contain Affiliate Links
