
This plan is my Pièce de résistance, an easy to build version of my most favorite chair and the one I own a variation of, and adore each and everyday. It is also the one that will only cost you around $25 to build, give or take, and for which I paid almost $300 for, per chair! When you calculate that out by 10 chairs, which is the number I have, just think of the savings…sigh… I am currently building this chair- to a certain extent (for those of you who would like additional pictures of the process to help you along) – I am building the frame, and then using it as a jumping off point for my next most amazing challenge, which is to provide all of you with an easy to construct plan, for a very intricately upholstered chair….WITH NO UPHOLSTERY NEEDED! I am honestly not 100% sure I can do it. But, I am going to give it my best try, and I am feeling pretty confident there is a decent chance of my success. It isn’t the chair construction that is difficult, it’s trying to find a way, for folks who don’t sew and don’t have upholstering tools or experience, to construct the chair. If it has to be sewn, and requires some skill, it is limited and not as user friendly, I’m just not as pleased with that option. Without further ado, this plan and construction is what I have been working on this week, along side my V-Frame Bookshelf (plans for that can be found here), which is primed and ready for color!
Showcase: Built From These PlansI am so honored each and every time one of you fine friends builds from these very plans! If you have built this piece, please take a moment and showcase your build! We are dying to see your fabulous hard work!
$25-$50
- Tape Measure
- Square
- Sander
- Drill
- Saw – Jig or Circular
- Kreg Jig
- Staple gun
- 1/4 sheet – 1/2” plywood (2’ x 4’ and can be low grade ply )
- 2 – 2×2 at 8′
- 1 – 2×4 at 8′
- 1″ Pocket Hole Screws
- 2 1/2″ pocket hole screws
- Wood Glue
- Wood Filler
- Sandpaper
- Finishing Supplies
- Staples
- Batting (chair padding) – about 1″ or so, in thickness
- Fabric – upholstery weight preferable **For 60” fabric width you will need 1 yard. **Any width less than 60” you will need 1 1/4 yards
- 1 – 1/2″ Ply at 16 3/4” x 15 3/4” (chair back)
- 1 – 1/2″ Ply at 19″ x 19″ (chair seat)
- 2 – 2×4 at 40” (Back legs)
- 2 – 2×2 at 17 1/4” (front legs)
- 7 – 2×2 at 16” (chair aprons and rails)
Before beginning to build, always check in on my site to make sure you have the most up to date set of plans, I occasionally update and change the plans to make the building process easier or to allow for less expensive purchasing of materials! Read through the entire set of instructions and all comments before beginning this project. If you print out or save plans, be sure to check in on my site to be sure you have the most up to date set of plans, as I occasionally update things for ease of building or buying. If you are new to building, read through the GETTING STARTED section and other articles found under the BUILD tab in the menu on my site, it has valuable information about how to get started, tools and techniques. If you are unfamiliar with the finishing process, visit my Finishing school for some tips and tricks for painting like a pro and for special finishing practices. Use glue to secure your joints and Consider Painting or Staining individual sections prior to assembling. This makes the paint application virtually flawless. Coat with a spray on Poly or Wipe on Poly to protect your finish and your piece and it will last for ages. Adhere to all safety standards and guidelines, and be sure you follow safety protocol throughout your build. If you are unsure about whether you are building safely, run a quick online search for the tool or technique you are using, or contact me via email or post to the forum before you move ahead. My contact info can be found in the menu of my site.


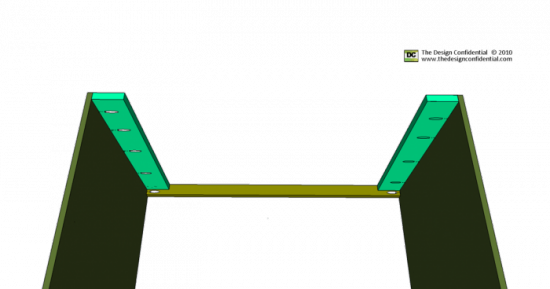
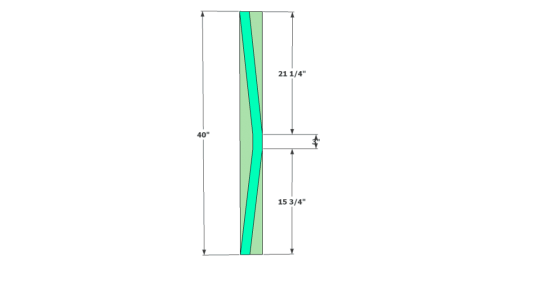
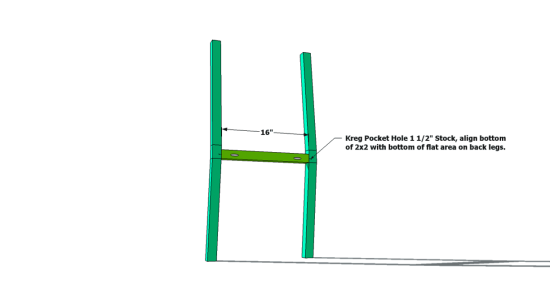
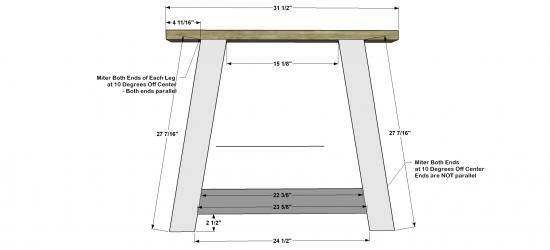
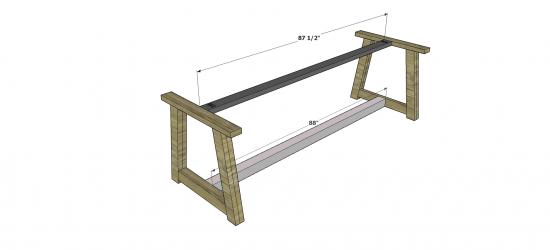
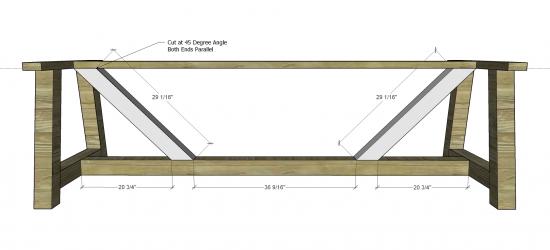
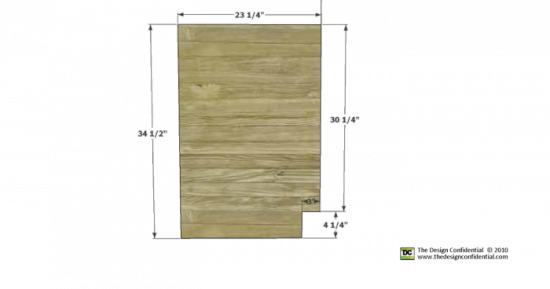
Cut your 2×4’s in the shape and dimensions indicated below. To begin, draw out the cut lines as you see them here, go slow, and be accurate. You will have the most success cutting this, with either a circular saw or jig saw. A jig saw can cut right along the lines you draw, whereas with a circular saw, you will need to stop at each change of direction and angle, and carve out the triangular piece you began with, before moving on in another direction. You want to be sure both legs match and that the bottom of the legs, and the 3” vertical center (where the seat will connect), line up as perfectly as possible. To ensure matching dimensions and angles, clamp the legs together after you cut them out, and sand the matching faces of both at the same time for all 4 sides. Once they are matching and sanded, connect them with the rail as indicated below. It will sit at the bottom of the 3” vertical space on the legs.. You can sand and finish this section or wait until you attach it to the chair front, but be sure to finish it prior to attaching the seat with it’s upholstery.


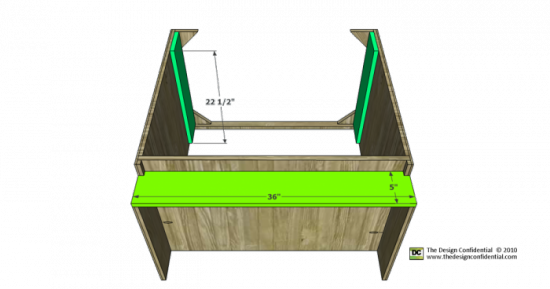
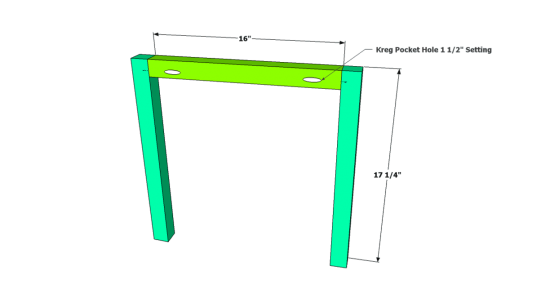
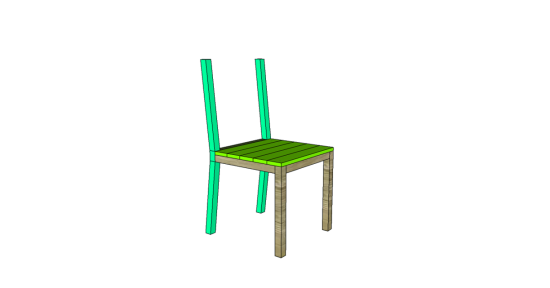
Build the front: cut all pieces to size, then place your pocket holes in the areas indicated below. Use your 1 1/2” setting and your 2 1/2” pocket hole screws.


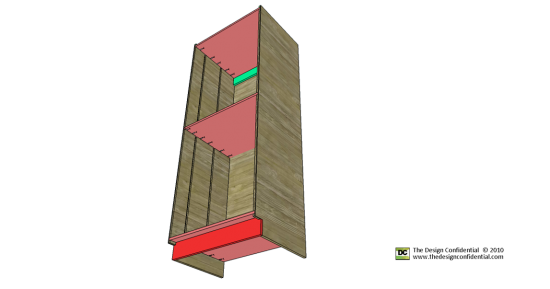
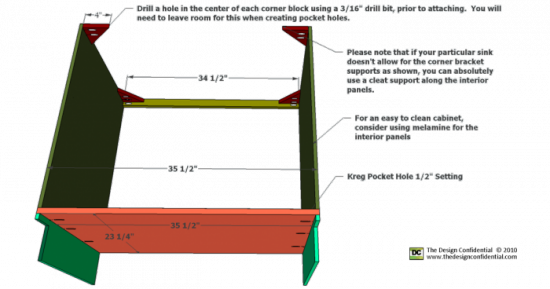
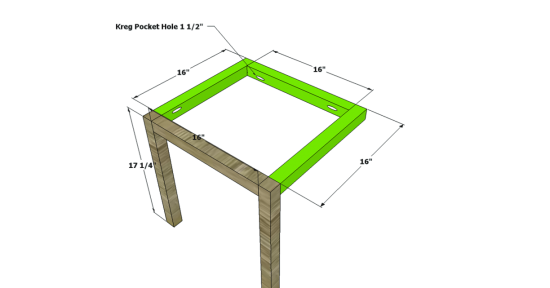
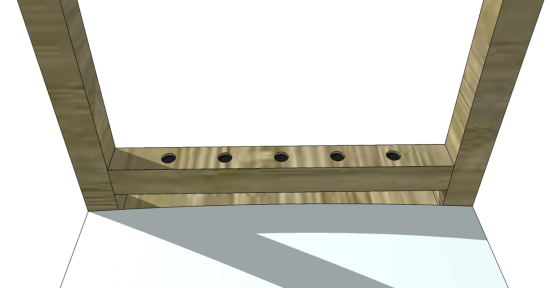
Cut your corner supports and place your pocket holes in an L-shape as indicated below, drill a hole in the center of each support. This hole will be used to attach your seat in a later step. Then attach the chair front to the chair back. Use the back aprons to attach, and secure from the inside as indicated in the bottom image.

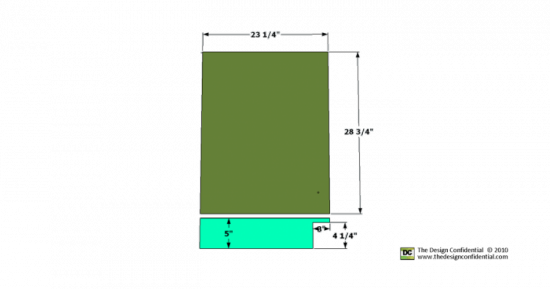
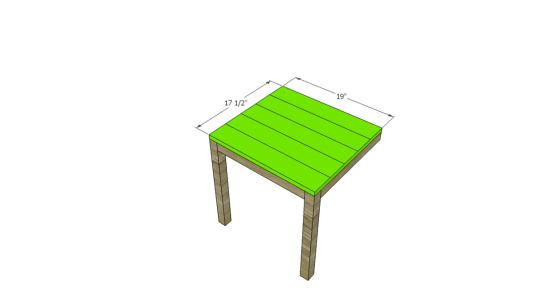
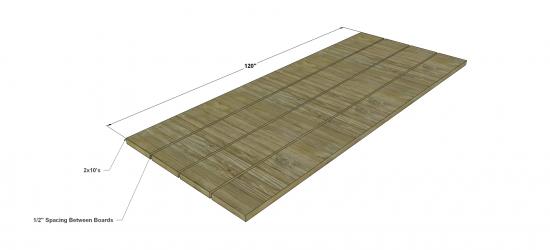
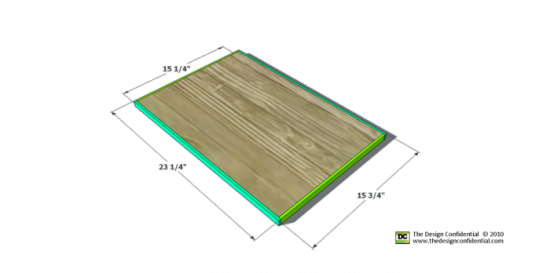
Cut out and then notch your seat bottom. **Do not attach yet, as we will be upholstering it next step. The dimensions are shown below with 1 1/2” squares notched out of the back corners


Cut your batting and fabric to size, and using your staple gun secure to the backside of the seat bottom. Staple them both at the same time, together. Start by stapling in each corner including the corners of your carve outs. Then you will work in a clockwise manner, stapling once per side (in the center of a remaining space) as you go around, continuing on in this manner until the fabric is completely secured. This pattern of stapling ensures that your fabric is not skewed or pulled more tightly on one side and helps you avoid wrinkling and pleating that you didn’t intend for. You will likely have a tiny bit of overlapping fabric in corners, but if you work in this manner, by stapling the corner then folding over the remaining corner fabric and stapling it, you can control the folding and make it appear nice looking.


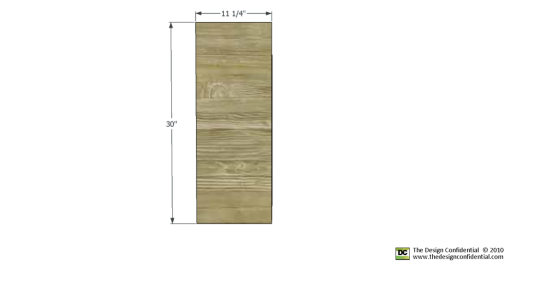
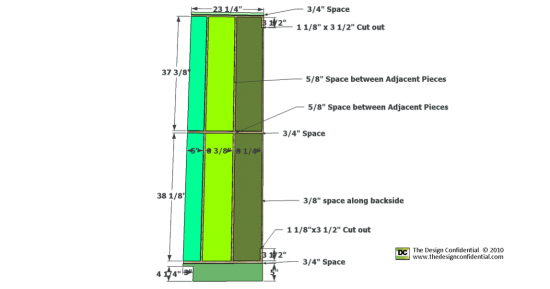
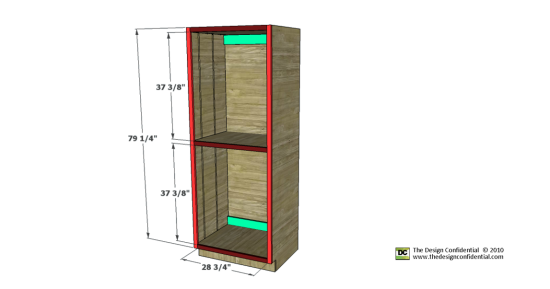
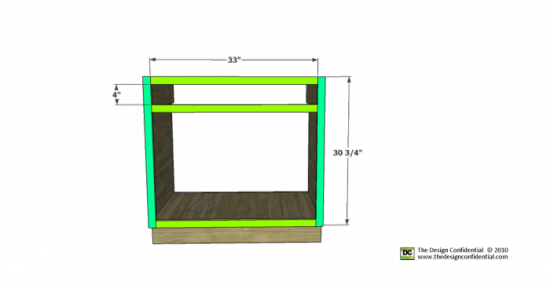
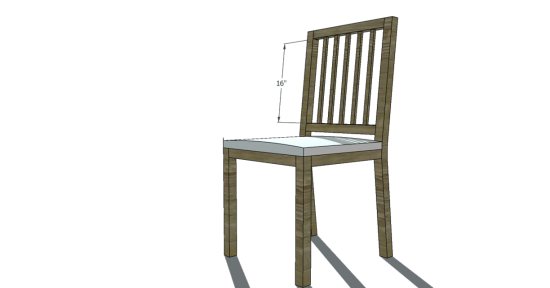
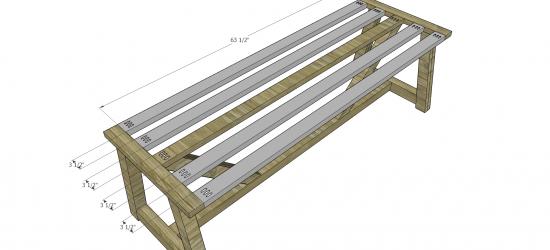
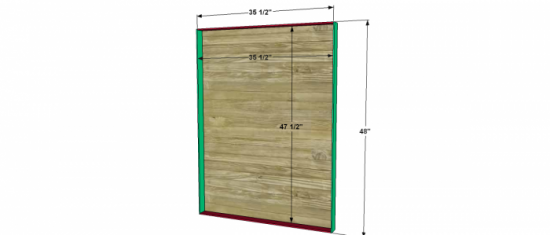
Cut your rails and panel insert to size, then create your pocket holes for them. **Do not attach yet, only create your pocket holes. The rails (both top and bottom) will have 1 pocket hole on either end of the back side (not shown).
Fill any Screw, Nail or Pocket Holes, Sand and Finish as Desired. For Finishing Tips and Tricks visit my Finishing School
**Disclaimer: Some rights reserved. Private use only. Feel Free to link to any of my plans so long as you provide an adequate link back to the appropriate post! Plans from this page are not to be used for commercial purposes or republished without the express written consent of Rayan Turner, The Design Confidential I hope to provide accurate plans, however, I cannot guarantee each plan for accuracy. Not every plan that I post has been built and tested, so you are building at your own risk. It is recommended that you have a clear understanding of how the project works before beginning any project. Please contact me if you find an error or inaccuracy so that I might fix it.


