
This project was so simple and has had such a big impact on my Monster Mash boy’s room, that I am kind of wanting to make a few more for other areas of my home. Such a fun build and doesn’t require any special skills or prior experience whatsoever… nope, nothing but a couple of basic tools, some glue, and a bit of patience to get this project finished! Many of you have seen similar items for sale for nearly $1000, so the savings on this piece is quite substantial, and the style it brings to your space is out of this world!
As with all of our plans, you are building at your own risk and you should have a firm understanding of building in general before you attempt many of our plans (some are easy as pie and perfect for beginners). With that, go forth, have fun, take lots of pictures and share them in a showcase on the site or on social media with the hashtag #builtTDCtuff and we will share our faves! Be sure to tag @thedesignconfidential on Instagram / FB and @thedesconf on Twitter / Pinterest. If you are a blogger and you post about your build, don’t forget to include a link to your post on your showcase here. Don’t forget… for all of our newer plans, clicking on the images will let them expand to enormous sizes with much greater clarity. The older plans may need updating so please let us know if you need one fixed!

$100-$200
- 4 (or more) sheets of 3/4″ PureBond Plywood
- 4 – Cut to desired shape for template
Before beginning to build, always check in on my site to make sure you have the most up to date set of plans, I occasionally update and change the plans to make the building process easier or to allow for less expensive purchasing of materials! Read through the entire set of instructions and all comments before beginning this project. If you print out or save plans, be sure to check in on my site to be sure you have the most up to date set of plans, as I occasionally update things for ease of building or buying. If you are new to building, read through the GETTING STARTED section and other articles found under the BUILD tab in the menu on my site, it has valuable information about how to get started, tools and techniques. If you are unfamiliar with the finishing process, visit my Finishing school for some tips and tricks for painting like a pro and for special finishing practices. Use glue to secure your joints and Consider Painting or Staining individual sections prior to assembling. This makes the paint application virtually flawless. Coat with a spray on Poly or Wipe on Poly to protect your finish and your piece and it will last for ages. Adhere to all safety standards and guidelines, and be sure you follow safety protocol throughout your build. If you are unsure about whether you are building safely, run a quick online search for the tool or technique you are using, or contact me via email or post to the forum before you move ahead. My contact info can be found in the menu of my site.
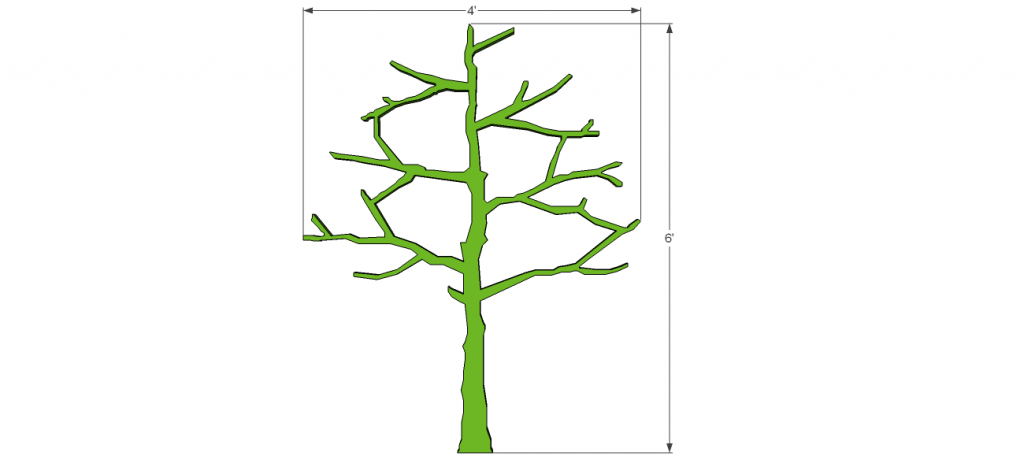
Sketch your tree shape onto a sheet of plywood. There are 3 possible ways to accomplish this, the easiest way to do this is to use a projector and project the image in full size onto your plywood. If a projector is not something you happen to own, there are two other method below for transfering your image.
1. Download the Template for Modern Tree Shaped Bookshelf : this will turn your image into a tiled poster by printing a series of pages. This is already exactly the size needed so no resizing or fancy stuff necessary when printing.
- Save the template to your computer.
- Print the template on 8.5 x 11 inch paper in Portrait Orientation. I have made this black and white with the least amount of ink necessary. This will print out 56 pages so be aware of the paper ‘cost’. Many of those pages will be blank and you can simply put them back in your printer and use again.
- Lay out the pages on your Plywood. They should print in order from left to right with only a slight overlap for each page. Your overal shape will be 4 feet by 6 feet. Once you have all of your pages laid out properly, tape together the pages you actually need and cut out the shape. Then simply trace around it and you are ready to cut out your first tree panel!
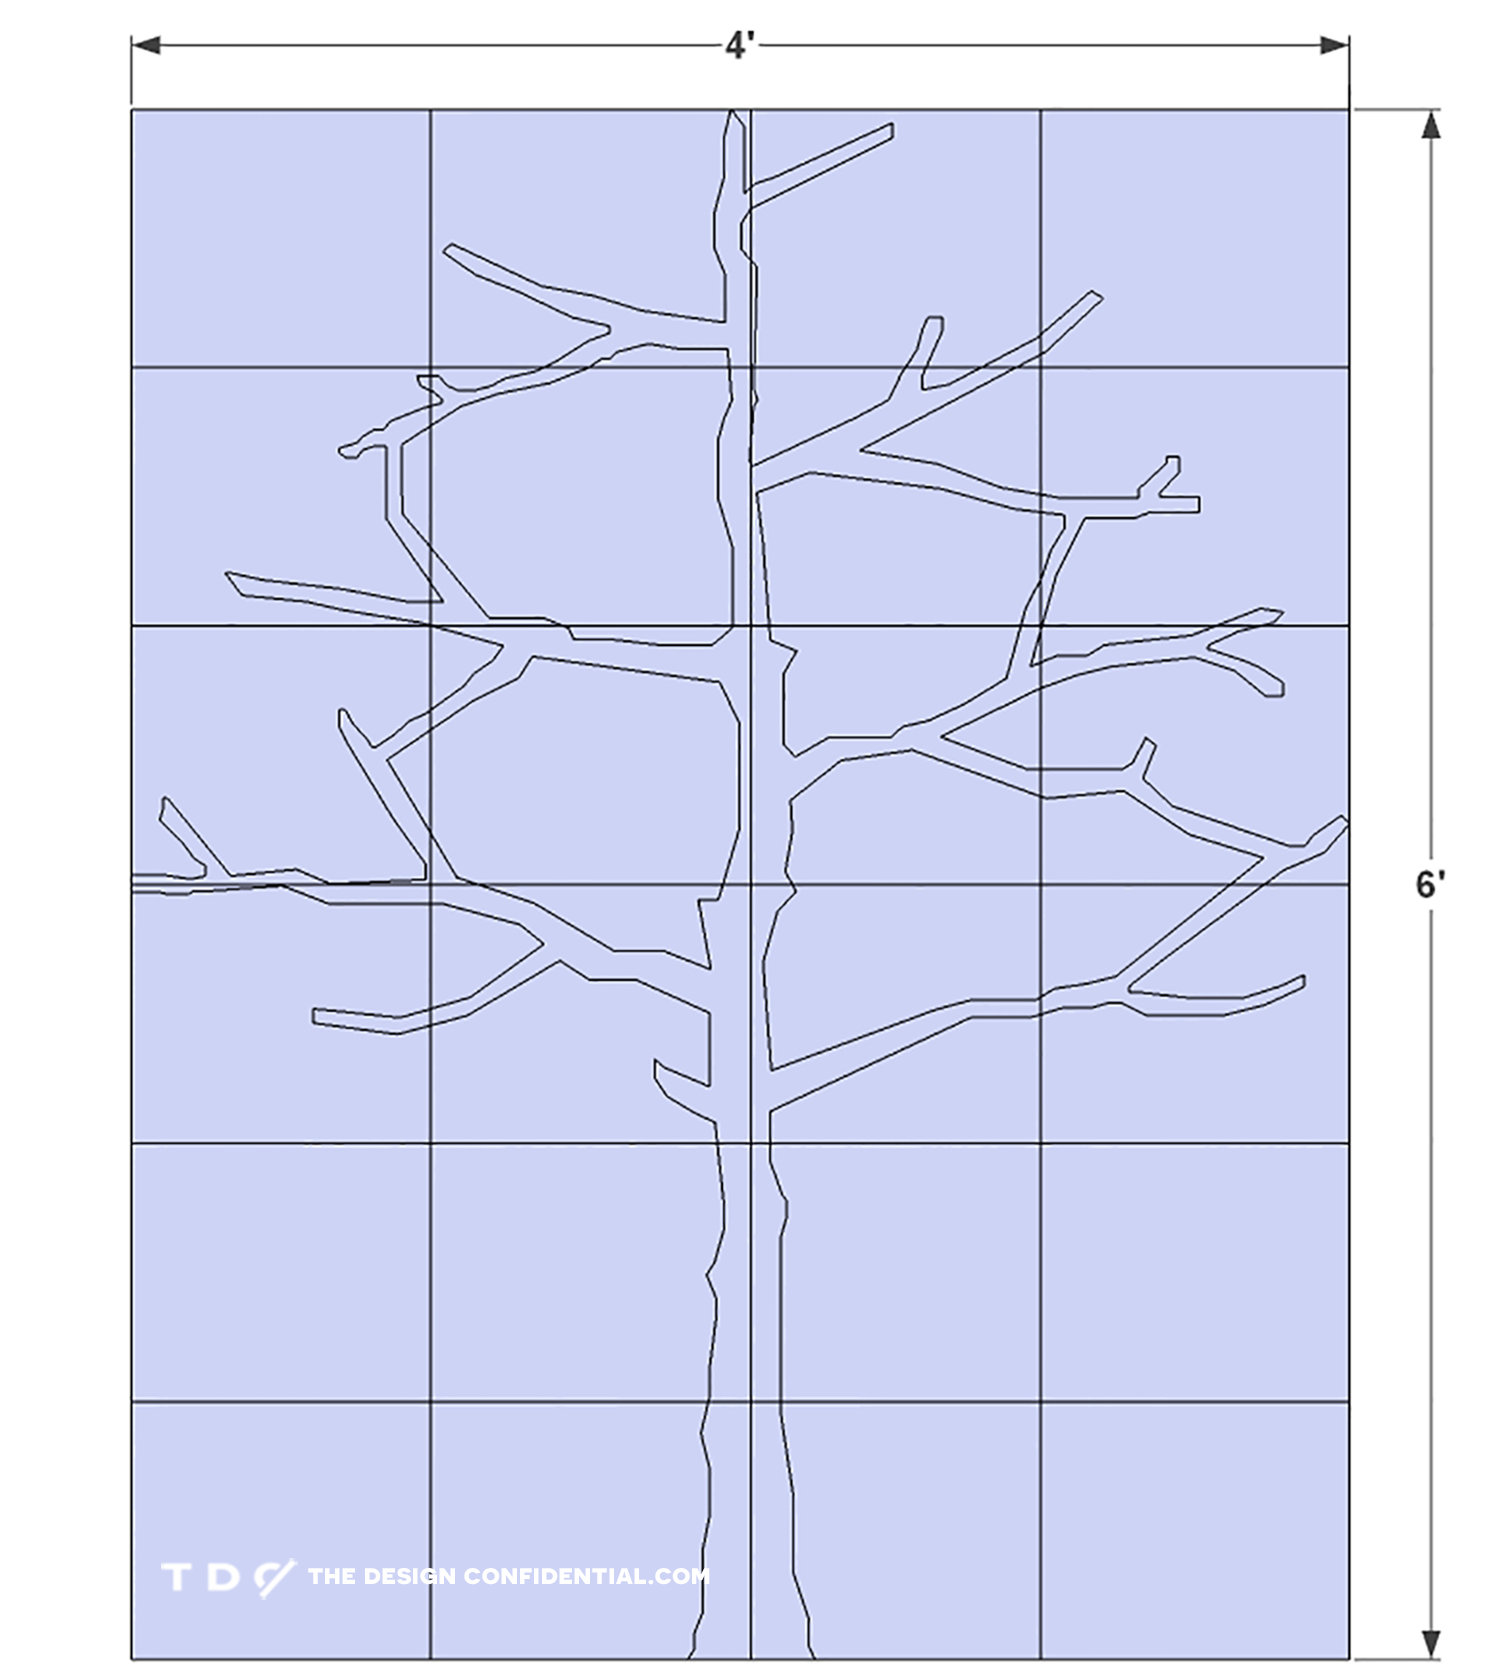
2. Grid Transfer Method
- Print the image below (right click and save to your computer, then print) in 8×10 format.
- Divide your image into a grid as you see in the diagram for this step. You will need 4 equal squares for the width of the tree (sized at 2″ each) and 6 equal squares for the height of the tree (sized at 1.67″ or 1 2/3″ each).
- Create this same grid on your sheet of plywood with an overall size of 4’x6′ and each square measuring at 12″x12″.
- Sketch the image onto plywood, one square at a time. This is much easier than attempting to free hand the image and will result in a more accurate depiction. If you need to mark up the squares themselves (to mark off and note midpoints etc) to help you along, that is perfectly fabulous.
Once you have your image sketched out, use your jig saw to cut out your tree. Please watch the video to get an idea about how this comes together!
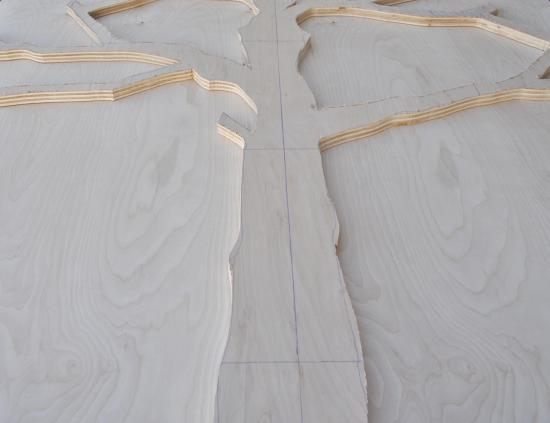
Use your first tree shape to trace your shape onto the remaining sheets of plywood and cut out exactly as you did the first.
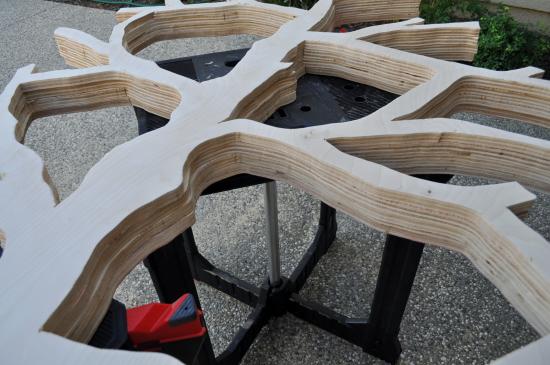
Once your trees are all cut out, glue them together by placing glue between each layer and clamping along the outside edges. Allow your glue to set up for about 30 minutes. Sand and Finish as desired.
Fill any Screw, Nail or Pocket Holes, Sand and Finish as Desired. For Finishing Tips and Tricks visit my Finishing School
This post is brought to you in partnership with 3M DIY. Learn how to work smart and be prepared at 3MDIY.com. Content and/or other value provided by our partner, 3M DIY.
**Disclaimer: Some rights reserved. Private use only. Feel Free to link to any of my plans so long as you provide an adequate link back to the appropriate post! Plans from this page are not to be used for commercial purposes or republished without the express written consent of Rayan Turner, The Design Confidential I hope to provide accurate plans, however, I cannot guarantee each plan for accuracy. Not every plan that I post has been built and tested, so you are building at your own risk. It is recommended that you have a clear understanding of how the project works before beginning any project. Please contact me if you find an error or inaccuracy so that I might fix it.

What is your estimate of the weight of the finished tree?
it’s definitely not light, but not extremely heavy either… maybe 30 lbs?