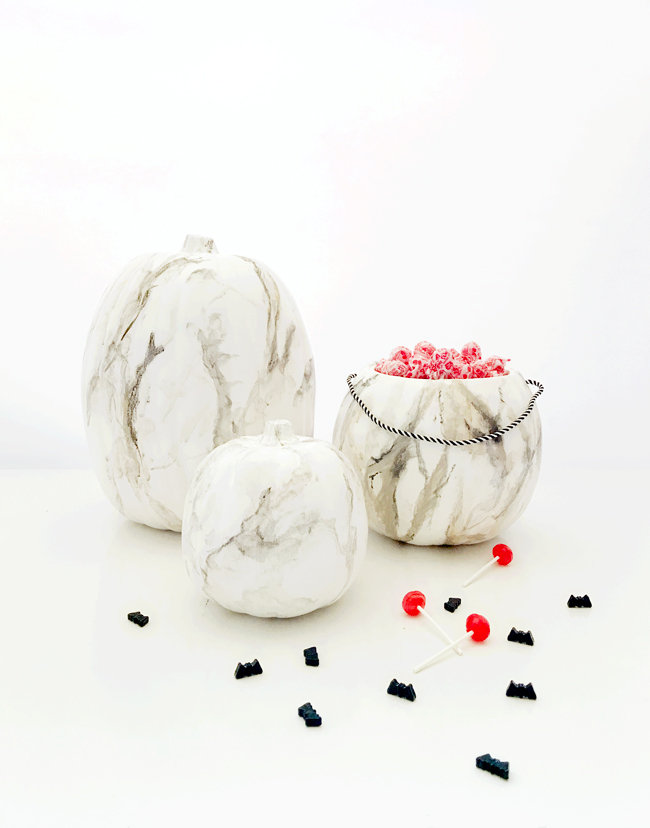
It’s that time of year again, when the faux pumpkins start to spring forth from my faux garden, or a little place I like to call Michael’s… and this year’s design is already set in stone with a DIY Faux Marble design. You see what I did there? Yep, feeling pretty clever today. Actually it has been something of a tough couple of weeks here at the Turner Casa so I am scrambling to catch up and a bit scatter brained, so hopefully this tutorial isn’t all over the place! But truly this DIY project is far easier than it looks, so hang on to your socks and let’s take a trip down faux finishing lane.
Funny little tidbit as a side note here: I earned some extra income while I was going to design school, by doing freelance faux finishing. Marble, leather, granite and aged everything were at the top of my request list and in all the years since, I have used these skills far more often than I ever thought I would.
MATERIALS //
- Craft Pumpkins – I used Large, Small and Treat Bucket
- Paint – White, Medium Gray, Light Gray, Black or Dark Gray
- High Gloss Sealant – this can be a Urethane or even a Decoupage Finish
- Feathers
- Sponges
- Paint Brush
- Sand Paper – optional, 400 grit
- Exacto Knife – optional
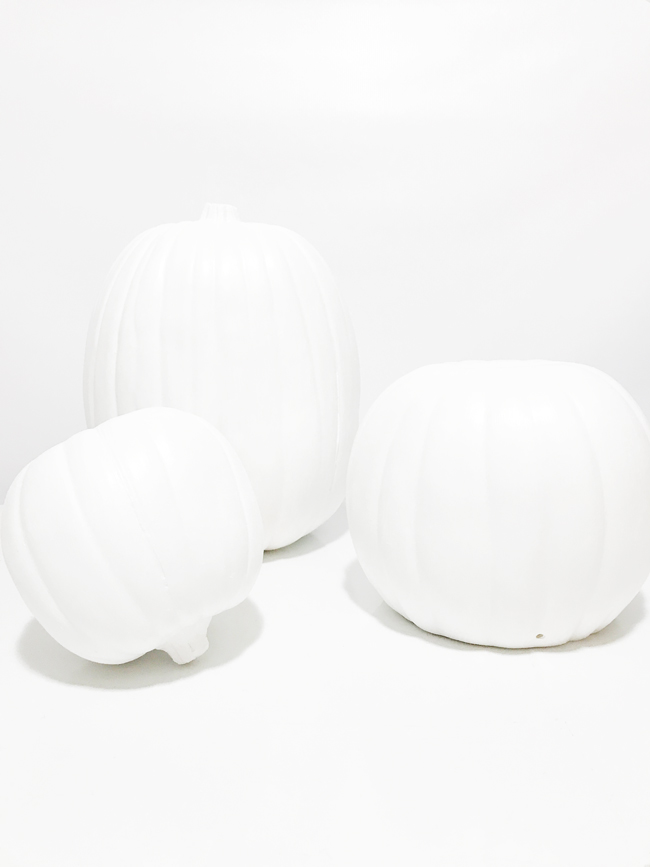
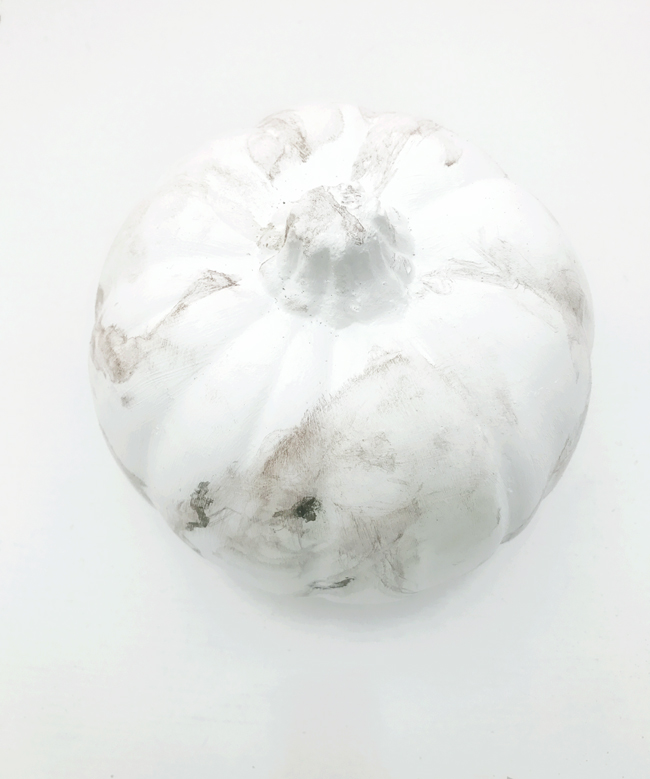
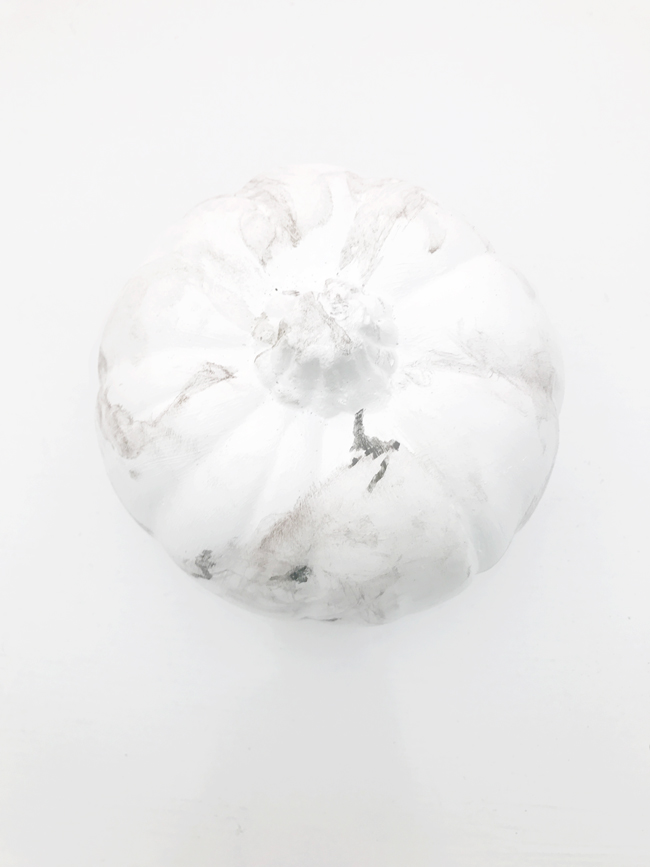
Start by giving your pumpkins a nice bright white finish. You want your pumpkins to be as smooth as possible in order to look like marble, so a high grit sandpaper may be a big help in removing brush strokes and other imperfections. I also made good use of my Exacto knife to carve away bumps that the sandpaper couldn’t take care of.
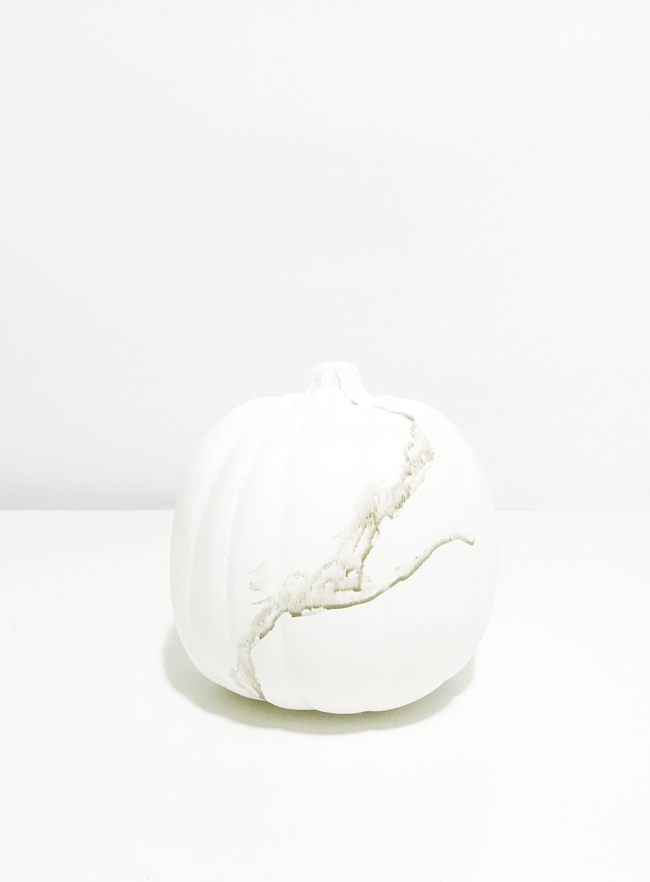
Dilute a neutral gray color with a 1:1 ratio of paint to water. You want it to be a bit wet, but not too runny. Run your feather through this diluted paint and drag it onto your pumpkin in an irregular line making sure to wiggle your feather as go. This will force your veining to alternate between thicker and thinner sections which will look more organic. Give this a few seconds to set up, more if it is runny, then you will switch to your sponge to blend.

To blend your veining in a natural way you want to use a circular sponge and you will press down and then rotate or twirl your sponge as as you lift it up and off your pumpkin. Do this all along your vein of paint to blend and remove the sharp edges of your paint line. Press and turn. Press and turn.
You want to give your pumpkin a series of veins all over in this one color. Then blend each vein and be sure to avoid repeating the same type of veining to attempt to make it as organic as possible. When you are unsure, just remember less is more and you can always paint over something that looks crazy, and begin again.
Make sure to have some of your veins go all the way to the stem and others run underneath on the bottom of your pumpkin. Have some veins that start or stop about two thirds of the way up and others that start at the bottom third of your pumpkin. Make sure you have veins that run horizontally and some that run at a diagonal. Make some areas thicker and of course some skinny and squiggly. Drag your feather up and then come back down a couple of times and even connect some of your veins to each other.
And when you feel good about your first round of veining in this color, begin to add a second set of veins in your lighter gray color. Dilute this lighter color as well, by about 50% with water. These can fill in a bit where your previous veins did not and can run alongside some of your previous veins, acting almost as a highlight to them. Keep these light and don’t add too many or it will begin to look contrived. That defeats the purpose here, so I shall say it again… less is more my friends. Don’t forget to wiggle your tail feathers as you create your veins, then press and twirl your sponge to blend as you go along.
Now you are ready for the finishing touch to your marbleized faux finish… you will add depth by using a slightly diluted dark gray or black and your small paint brush. When I say slightly diluted, just add a few drops of water to your dark color so it is easy to work with. In the areas where you see your veins are darker, add some shadowing and dark dots and bits as you see above. Only in a few places and don’t do the same variety of dark spots and lines everywhere. Mix it up and add darker veins in some places while you add a trailing series of dots and squiggles in other places. Keep these among your existing veins and you should be pretty pleased with how amazing it looks.
If your dark bits and bobs look too stark like in the image above, use a finger to gently smear your squiggle so it looks more like the image below.

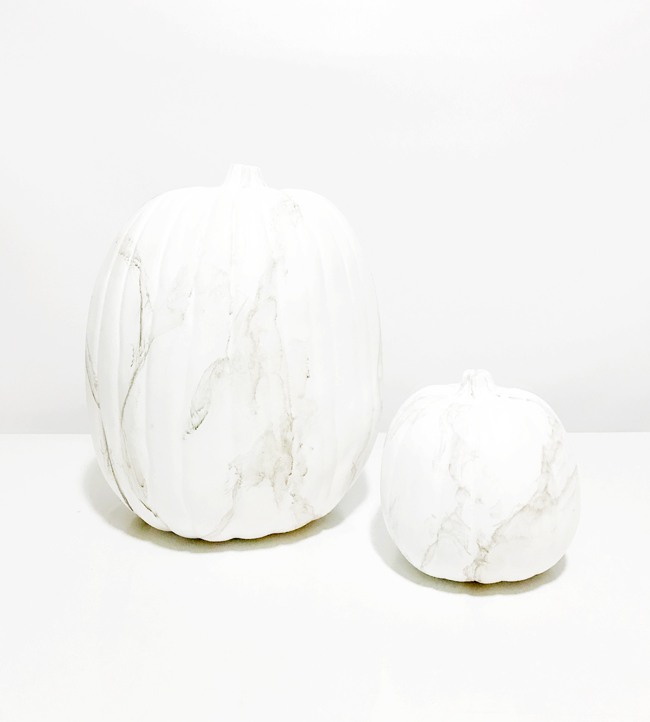
Of course if you remove too much paint or it becomes too convoluted, add some tiny dabs of the same color in the same area to bring back a bit of the depth. Allow some of the darker paint to blend while other areas can retain some of their high contrast and you should end up with something like you see below. When you do more than one of something, it’s always helpful to give each one a slightly different pattern and a slightly different amount of each color. One can have more veining, another can be darker overall while the third can be minimal and light.
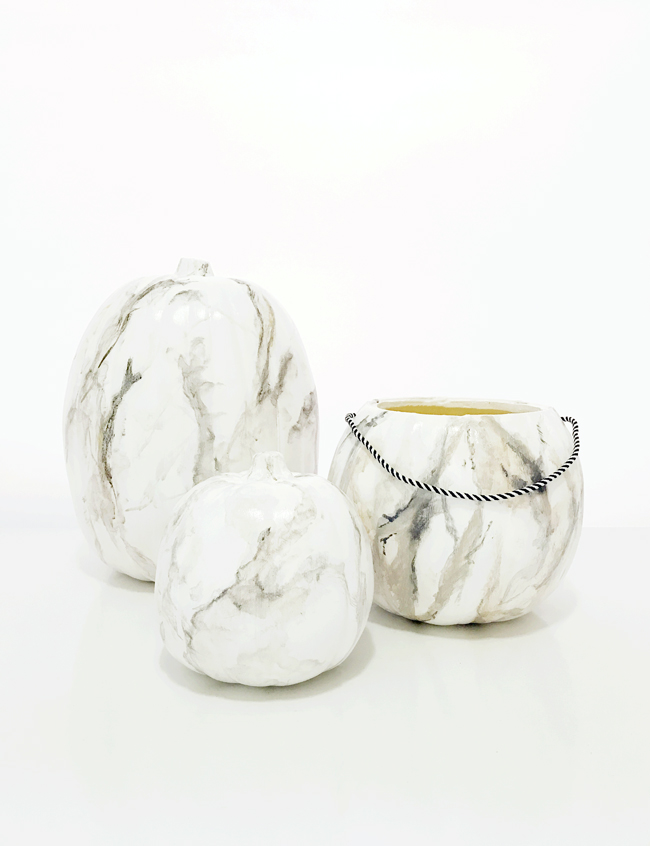
Once you finish with your marbling, you will want to seal to seal your beauties well with a high gloss sealant of some variety. I used a decoupage medium that allows the pieces to be washed and endure the elements. In my house with all the boys abound, this is probably a necessary thing.
Check out my pumpkin projects of yore with my No Carve Glow in the Dark Pumpkins, Skeleton Pumpkins, Faux Horn Pumpkins, a DIY Headless Horseman Costume using Pumpkins and my Easy Carve Confetti Pumpkins complete with Salt and Vinegar Pumpkin Seed recipe. For all projects and posts that relate to fall and pumpkin wonderfulness, click here.
This project was created in partnership with Michaels and my role as a Michaels Maker. Thank you for supporting the brands that make this site go round! From playful pumpkins to spooky sights, Michaels has everything you need to MAKE it Spooky this fall!

Awesome article and awesome work. Can’t believe you create this stylish design from pumpkins. Thank you for sharing with us. Since this is a pretty cool and easy to understand design I think everyone gonna try this. Great work, keep them coming. cheers.